Algolia Pro Documentation
Dive into the powerful Algolia Pro features and customization
Found an issue or a problem that you can't find an answer for? Create an issue in our Premium Issue Tracker.
Before you start
Before you can install a Premium Plugin, you are required to have the License Manager plugin installed. It is a free plugin available in GPM and can be installed like any other through the Plugin section of the admin plugin, or via command line.
$ bin/gpm install license-managerInstallation
First ensure you are running the latest version of Grav 1.7 (-f forces a refresh of the GPM index).
$ bin/gpm selfupgrade -fThe Algolia Pro plugin makes use of the sitemap plugin to function properly. These are available via GPM, and because the plugin has dependencies you just need to proceed and install the Algolia Pro plugin, and confirm when prompted to install the others:
$ bin/gpm install algolia-proYou can also install the plugin via the Plugins section in the admin plugin.
Configuration
Algolia Pro has a lot of configuration options that can apply to various functionalities: Plugin, Frontend, Backend / Indexing.
For the sake of better organizing the documentation, we have split these areas into separated pages, so you can fully focus on what you are looking for.
 |
 |
|---|
Plugin Configuration
![]()
Traditionally, plugins can be configured from the "Plugins" section in the Admin, however due to the nature of Algolia Pro and the different areas of configuration, we have consolidated everything in an Admin menu item.
You will be able to reach these settings either from the sidebar or, if you are in the plugin settings, a note will link you to the proper location.
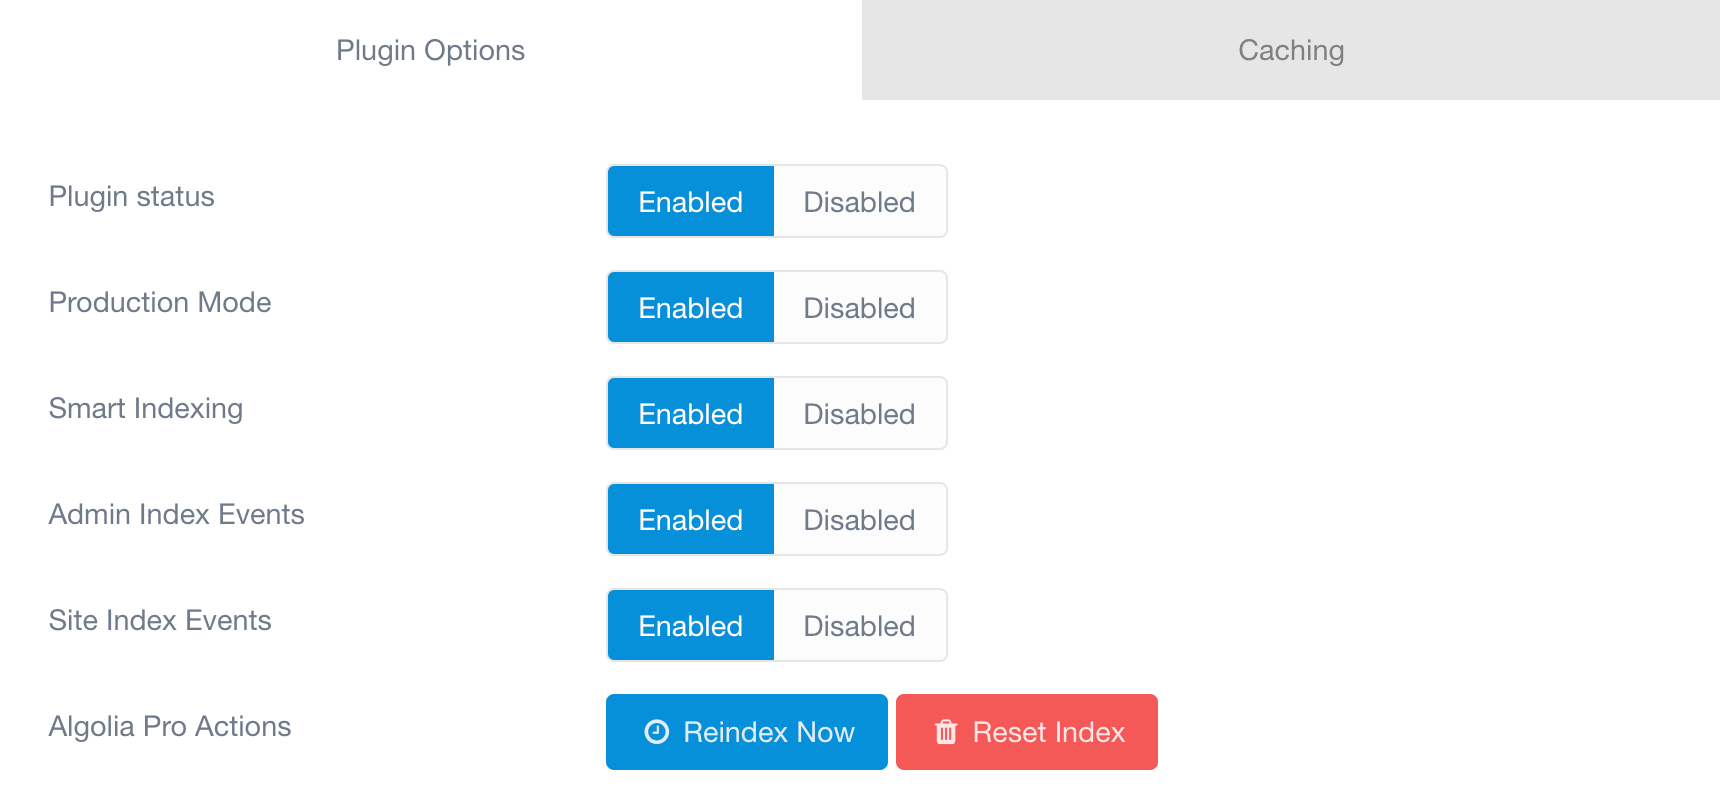
Plugin Options
-
Plugin status → Will enable or disable the entire plugin.
-
Production Mode → When disable, it will stop any API communication with the Algolia service. Useful for for development and to try
dry runqueries. -
Admin Index Events → When enabled, it will trigger a reindex of an object/page when the
onAdminAfterSaveoronAdminAfterDeleteevents are triggered -
Site Index Events → Similar to Admin Index Events, enabling this will reindex of an object/page when the
onFlexObjectAfterSaveoronFlexObjectAfterDeleteevents are triggered -
Algolia Pro Actions
Reindex Now→ A shortcut button for manual reindexing. This is the same shortcut as the one found in the Admin Quick Tray.Reset Index→ This will first reset all the Smart Indexing data, then fully flush all the remote indexing data, then fully reindex.
Algolia API

-
Application ID → The ID of the application allowed to perform API actions. Follow the Algolia: Create an Application guide below to create one.
-
Search only API Key → The "Search-Only API Key" associated to the application ID specified above. Follow the Algolia: Create an Application guide below to create one.
-
Admin API Key → The "Admin API key" associated to the application ID specified above. Follow the Algolia: Create an Application guide below to create one.
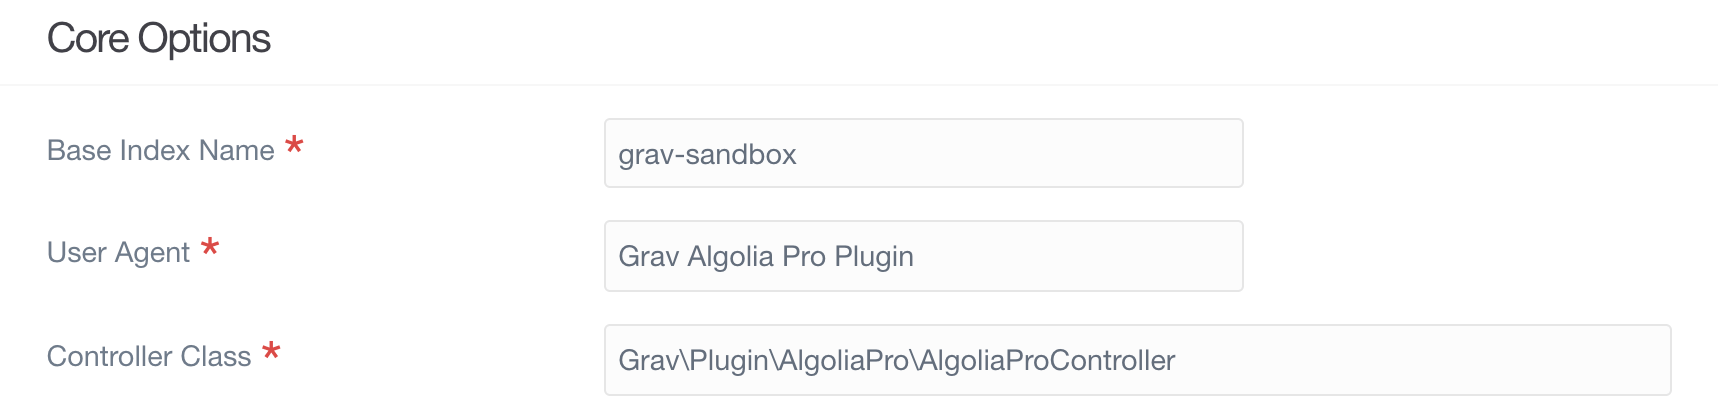
Core Options
-
Base Index Name → The default index name. Used to prefix indices on Algolia. Every index on Algolia Pro can configure their own index name. This is generally something that identifies this specific site in case you have multiple sites or indexes using one Algolia account.
-
User Agent (advanced) → The User Agent utilized to sign the requests to Algolia when performing API calls and Page Crawler indexing.
-
Controller Class (advanced) → The default class to utilize for indexing and querying. If you have a need to create your own controller class, just reference it here...
Index Schedule

Algolia Pro integrates with Grav's Scheduler to automate the task of periodically indexing your content.
-
Add AlgoliaPro to Scheduler → When enabled, AlgoliaPro gets added to the scheduler jobs list.
-
Run Indexing at → The recurring timing at which the job gets executed. This uses the cronjob format.
Algolia: Create an Application
In order for Algolia Pro to be able to communicate with the Algolia service for searching and indexing, it is required that you create an Application first. If you don't have an account already, first thing you should do is create one.
Algolia has a very generous Free plan that should serve well for most cases. As a free account, you will be only allowed to have one application. If you are purchasing Algolia Pro for your clients, you should create an account on their behalf.
Once you followed the sign-up process to the end, follow these steps from the dashboard:
- Click on the application name (this can also read as 'Unnamed application') at the top left of the dashboard and select the "Create Application" option
- Choose a name and a plan. For this guide we are going to name the Application "Algolia Pro Docs" and select the "Free" plan.
- Click on "Next Step: Data Center" on the right sidebar and pick the datanceter that best work for your site. Algolia automatically gives a ping estimate based on your location. Keep in mind this estimated response is between Algolia and you specifically, not the server where Algolia Pro will reside on.
- Click "Review Application Details"
- Accept the terms and click "Create Application"
If everything worked correctly, you should now be greeted back to your dashbord and notice your application name at the top, in this case "Algolia Pro Docs". Below your name is also where you will be able to finally access the API Keys.
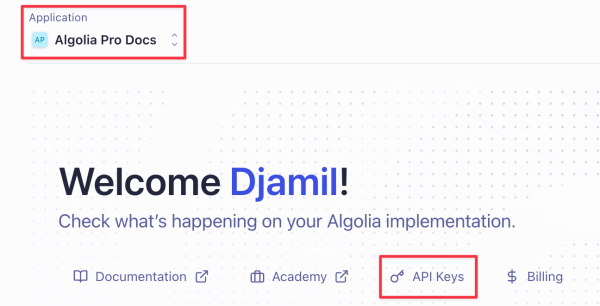
Clicking on API Keys will take you to the page where you can retrieve the keys necessary for Algolia Pro.
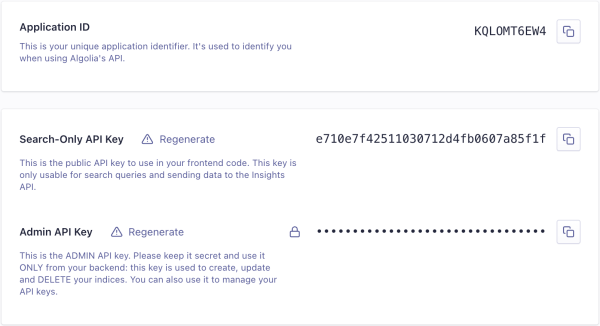
You can click the lock icon to show/hide the Admin API Key. You can also click the right icon to copy to clipboard.
|
|
|---|